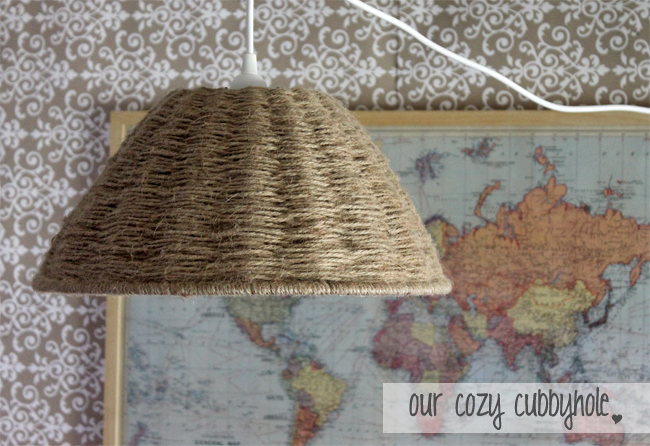
$14 DIY Basket & Twine Pendant Light
After long last, I am excited to share a project with you that I did in preparation for Walker’s parent’s visit the other weekend.
For over 3 years, I have lived in this apartment with just one floor lamp for the entire living room. It was a terrible lamp and the only place to put it was all the way on the opposite side of the room from where we actually spend time. USELESS. So as a result, we packed it with 100 watt bulbs and it would blind us with it’s cruel, harsh beams. We have discussed hanging a pendant light over the couch for ages but have never taken the plunge.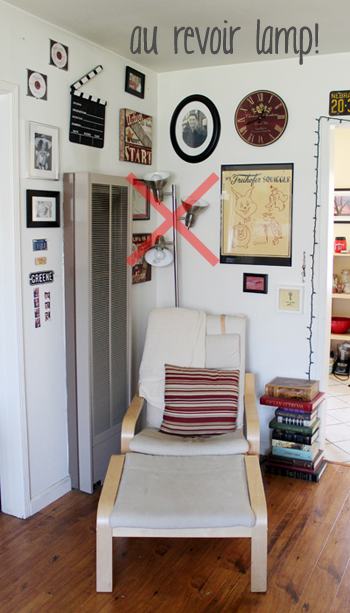
Fast forward to about a month ago when I received the IKEA catalog in the mail (oh, happy day!). I was flipping through and saw the $5 HEMMA cord set. ONLY FIVE DOLLARS?! Sold. The wheels in my brain started turning (scary, I know) and I thought of a few cool DIY lamp shades I have seen. None of the ideas really fit our room but I loved the concept of the wire basket lamp shade I saw on Pinterest. Then it all came together….
DIY Basket & Twine Pendant Light

First I went to IKEA and the hardware store to pick up supplies:
HEMMA Light Kit – $5
14″ Hanging Flower Basket – $7
1/2″ Plumbing Flange – $2
Twine – Free! I had a bunch leftover from other projects :)
Tools:
Wire cutters
Scissors
Sweater Shaver (Yes, I’m serious. You’ll see…)
Optional:
DIMMA dimmer cord – $8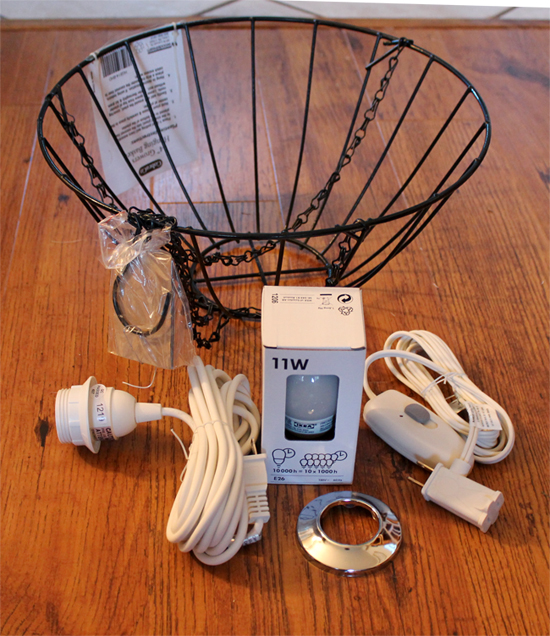
1. Remove the natural liner from inside the wire basket and take a look at the design of the base. Mine was a simple X but yours may require a some alternate wire cutting. I wanted to cut enough of an opening in the base to allow the light fixture through the basket but keep the wires close enough so that they would rest on the flange.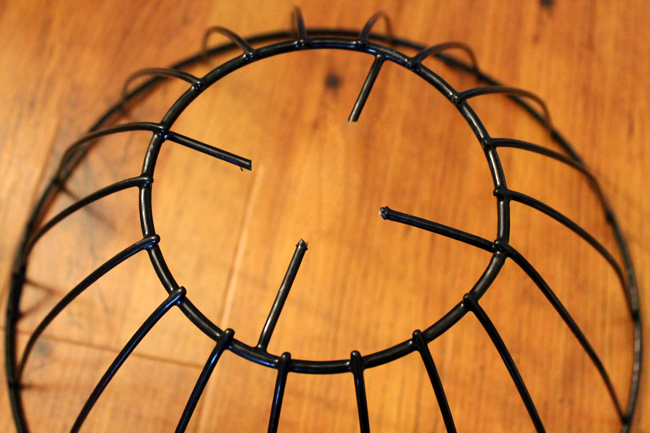
2. Once you have your wires cut, test to make sure everything will fit together before you bust out the twine. Place the flange over the light kit. You can buy a wider flange and put it on the correct side of the light kit as the instructions suggest. However, I wanted the bulb to hang a little lower (to create a little more space between the shade and the bulb for fire safety reasons) so I placed the flange higher on the light kit (see pic below). Then hang the shade on light kit and flange combination and you should have a basic idea of what the bones of your light will look like!
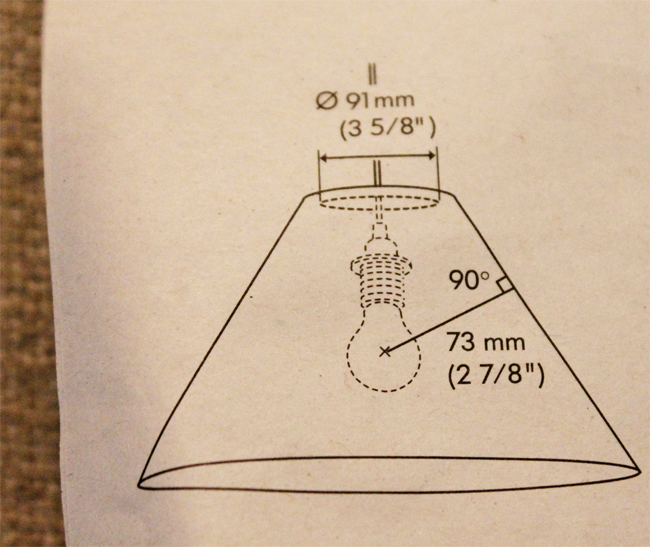
I wanted to make sure the lamp was far enough away from the shade!
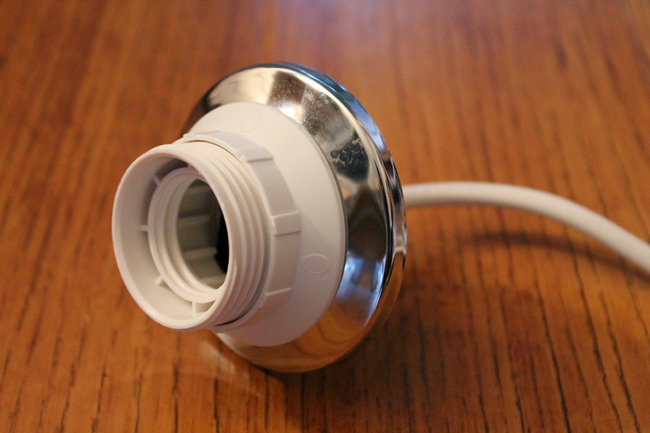
In the picture above, rather than unscrew the piece on the left and place the flange in there as the instructions suggest, I instead ran the cord all the way through the flange and placed it to the right of the entire bulb unit.
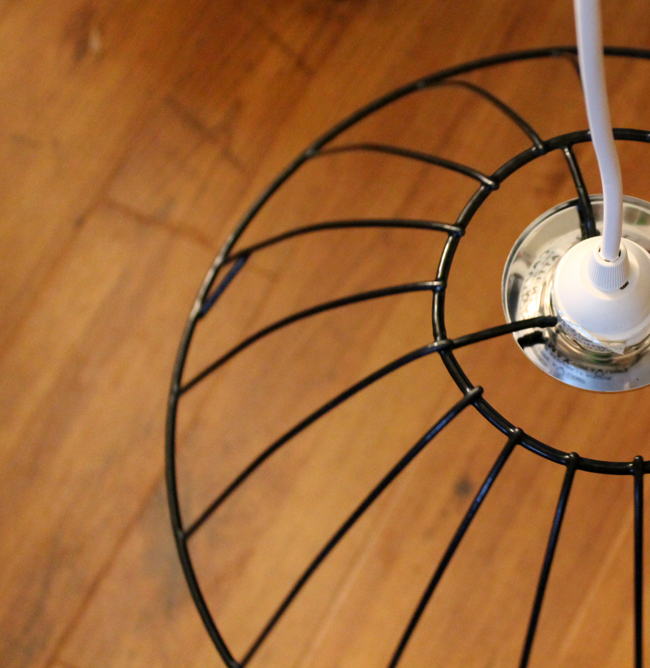
The bare bones of your lamp! Sorry for the terrible pic… I cut it off and never took a better pic. I promise I wasn’t trying to be artsy. ;)
3. Here comes the tedious part: wrapping the twine. I tried a few attempts I wasn’t crazy about. I thought vertical stripes left too much bulb showing and would send us into sad flashbacks of being blinded by our other lamp.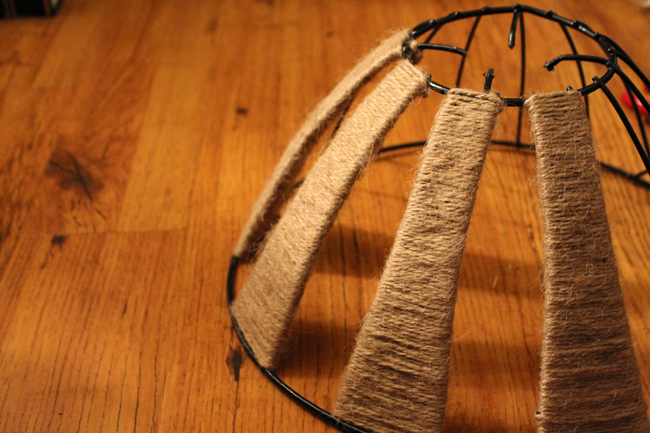
I really wanted something softer and more cozy, so I decided to go with the simple over/under technique to cover the entire shade. This took me several hours over several days… it is a serious commitment, folks. Not only did I end up having to buy more twine (okay, you caught me… add a few extra bucks to the grand total) but I managed to hurt my back crouched over the stupid lamp for so long (old lady!). Also, I discovered the one thing in the world that sheds more than Bo: a twine lamp in the construction phase. Be ready to get out your vacuum.
A few notes on my process:
– As I ran out of twine, I would tie on a new piece and make sure the knot fell where the twine was going behind a wire (so it would be visible on the inside instead of the outside).
– Pull the string tightly enough that you get a distinct over/under look but not too tight. You want to leave yourself a little wiggle room for when you get to the end and are trying to finish it off.
4. Once I had wrapped just about as much twine as humanly possible, I decided that the plain black bottom wire looked cheap and the lamp looked unfinished (sorry no pic!). So I finished the lamp off with a cute little twist at the bottom, wrapping the twine around the bottom wire and the last two passes of twine (to make sure the twine didn’t slide upward away from the bottom wire).
5. After the shade was finished, its twine hair looked as disheveled as my morning hairdo (true story). So I used a pair of scissors and a sweater shaver to give it a little haircut. Sadly, I managed to break my sweater shaver but it WAS working well prior to its destruction.
6. I re-assembled all of the lamp pieces and finally got to take a look at what my final product would look like! Feel free to use a little glue to attach the flange to the wire shade to keep it steady.
7. Time to hang the lamp! Make a little pencil mark in the ceiling where you’d like to hang it and use the enclosed hooks and instructions to get the hook in place. I did this and ended up with a hook so loose that I could practically use my mind to make it fall out of the ceiling. So plan B… I found a plastic molly in my tool box that actually fit the hook I was using for the ceiling! WOOO! So I drilled a hole in the ceiling, inserted the molly, and then screwed in the hook. SOLID AS A ROCK. And it’s a good thing too because the massive amounts of twine made the lamp shade pretty heavy! The second hook by the wall screwed in nice and tight so there was no need for another molly (plus this hook was not bearing any weight… it is just there to redirect the wire).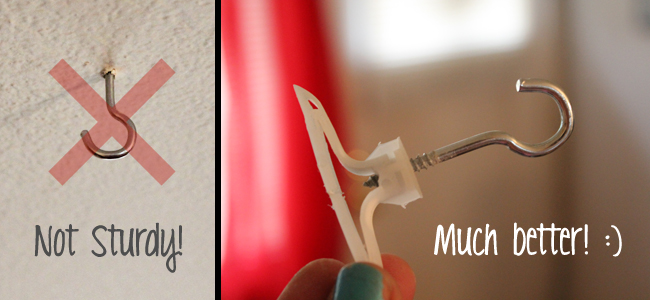
8. Follow the instructions included in the kit to figure out how to rig up the little plastic wire holders (so the weight of the lamp is not on the bent wire). I even tried to use the flower basket chains as a decorative accent along the wire but it didn’t look great so I took it down.
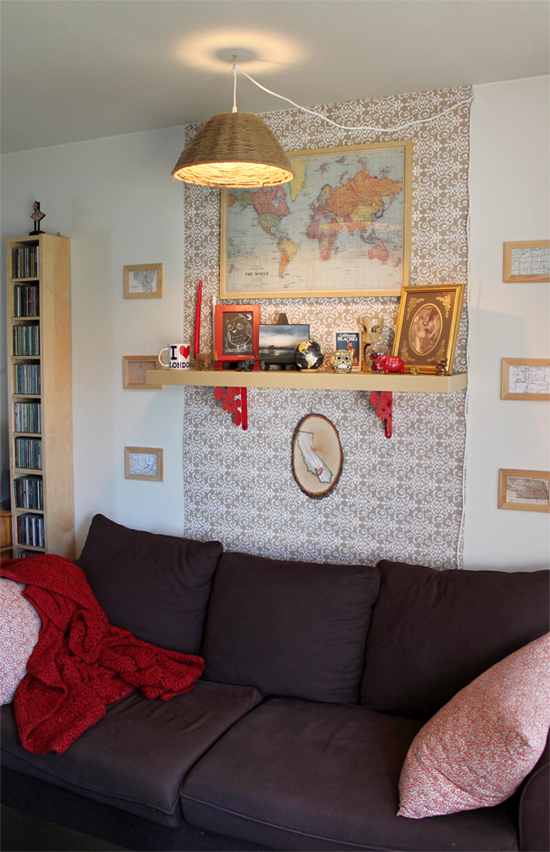
9. Plug her in and you have yourself a DIY Basket & Twine Pendant Light! We even added the bonus dimmer switch so we can vary the brightness of the lamp (**NOTE: DO NOT USE THE BULB PROVIDED IN THE LIGHT KIT WITH THE DIMMER. They are not meant to be in love and will set your house on fire**). We used one of our leftover 100 watt incandescent light bulbs from the old lamp (max wattage is 150 for the lamp kit) so we can go nice and bright if we want to! Or we can make the light dim and cozy for movie nights. :)
The living room is like a new place now… all for only $14 (okay… about $25 if you count the dimmer cord and the extra twine). We love our new lamp!!