DIY Vertical Herb Garden
Walker and I are happy that the blistering heat is starting to work its way out of Los Angeles (okay, so it isn’t quite gone yet but fingers crossed!) and we are gearing up for cooler weather. One thing that I have been wanting to do as soon as summer ended is to plant a new herb garden (mine cooked to a crisp in August last year). Since the heat isn’t quite gone yet and because there are still some fairly cold nights in winter, I wanted to make something that was very portable and could easily take up residence on our kitchen table in front of the window. I also figured that, for a lot of you, an indoor herb garden was your only option since you have REALLY cold winters!
So I began planning. With only one window and a very tiny kitchen table, I knew I had to think small. I saw some cute hanging planter options but that wouldn’t be portable or allow me to bring the herbs outdoors to enjoy a moderate afternoon. They also typically required a few holes in the walls, which I try to avoid as a renter! So then I thought… why not go vertical? I did a little more research and only found some very large scale vertical planters for outdoor use (such as this one that is over 4 feet tall). So I decided to adapt the idea for indoor use (and do it as inexpensively as possible).
And that brings us to the part where you usually see a lot of pictures and a few steps. But I am taking a walk on the wild side today and am trying something a little different… a video tutorial!
For those who can’t watch videos at work or gave up listening to me blabber after a few minutes, here are the basic steps:
DIY Vertical Herb Garden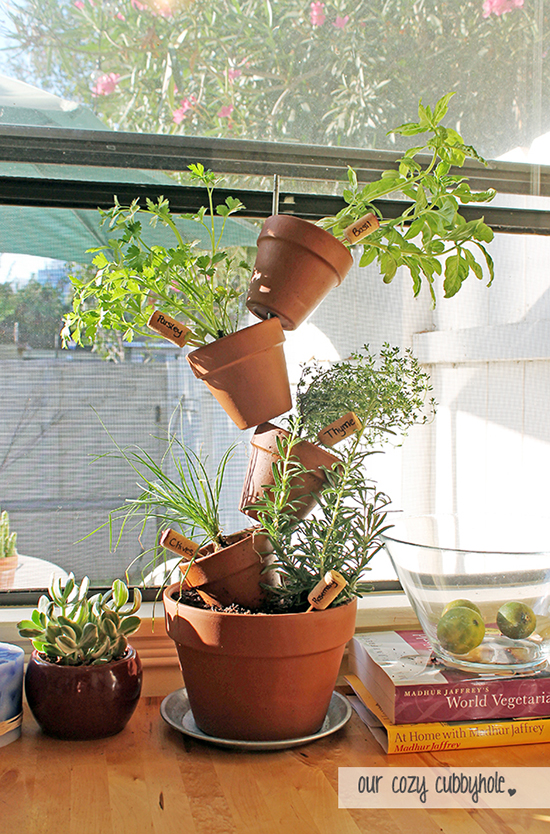
Supplies:
8.5 inch pot with holes for drainage (I used terracotta but feel free to get a fun ceramic one if you’d prefer) – $3.29
Four 4.5 inch pots with holes for drainage – $1 each = $4
24 inch lightweight (but NOT flexible) metal rod – $1.29
Potting Soil – $5
Herbs (you can get whatever you’d like but I got five 4 inch herbs at $2.50 each) – $12.50
1. Fill the 8.5 inch pot about two-thirds of the way with soil and pack it down very tightly.
2. Insert the metal rod into the center of the pot. The soil should be packed enough that the rod is already able to stand up on its own.
3. Slide a 4.5 inch clay pot over the rod and set it at an angle off to one side. Use soil to build around the small pot to bury it a little and create a supportive base for the weight of the pot (none of the weight should really be on the rod. In fact, it should actually help stabilize the rod). Place soil into the small pot in order to help anchor it in place. It should be very sturdy before you move onto the next step.
4. One at a time, slide the remaining 4.5 inch pots over the rod and rest them on the previous pot at an angle going in the opposite direction. The base should rest on the edge of the previous pot and the top should rest against the rod. Fill the base of each pot with soil to anchor it down before moving on to the next pot. If the entire structure starts to lean, adjust the angle and support of the first (partially buried) 4.5 inch pot. The rest of the pots depend on the angle and support of this first pot.
5. Now that you have the structure of the planter in place, it is time to plant your herbs and enjoy! Make sure you give them all a good watering to begin with and then water according the the provided instructions.
6. Create fun herb labels using wine corks and wood BBQ skewers. Use a marker to write the name of the herb on the cork, cut the skewers down to a smaller size, insert the pointy end of the skewer into the cork, and place the opposite end into the soil. All labelled! :)
So there you have it: a DIY Vertical Herb Garden for indoor use in the fall for under $14 ($26 if you count the herbs!). We love our fun, funky little herb garden! Not only does it make our kitchen smell like magic, but it is also a new sculptural centerpiece for our kitchen table!

 **So let’s get back to that video thing. I positively hate watching myself on camera but I would love your opinion, especially if you feel differently! Yay or nay on future video tutorials? Did you enjoy the change of pace? I will aim to make them shorter in the future but I was just having so much fun playing with dirt on my kitchen table. ;)**


 "Pin It")