Classin’ Up the Living Room

H ey- remember me? I am the girl that writes this blog sometimes. I am starting to work on final projects for school (time flies!) so I have been up to my ears in work. Unfortunately, the blog has suffered but I am hoping to come back with a vengeance soon! ;)

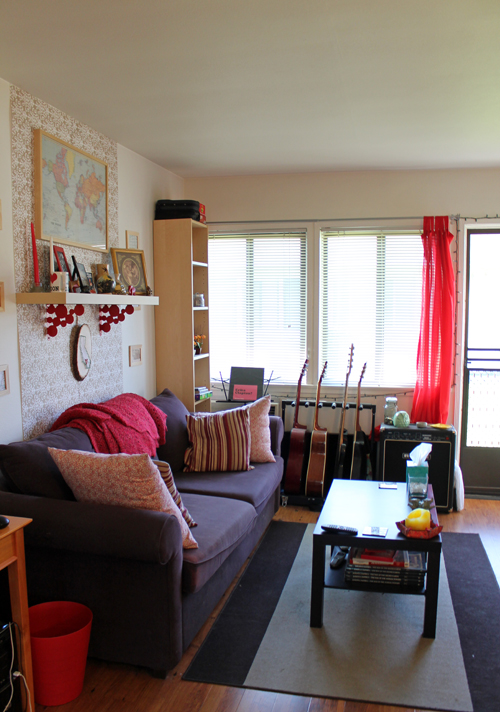
In the meantime, I wanted to share a quick little update from our living room. A couple of weeks ago I mentioned that we had found an awesome deal for a new rug on Overstock. So without further ado, let’s get to the pictures! Here is old rug for those of you who need a reminder:

CoffeeTable1And here is our gorgeous new rug:Rug1

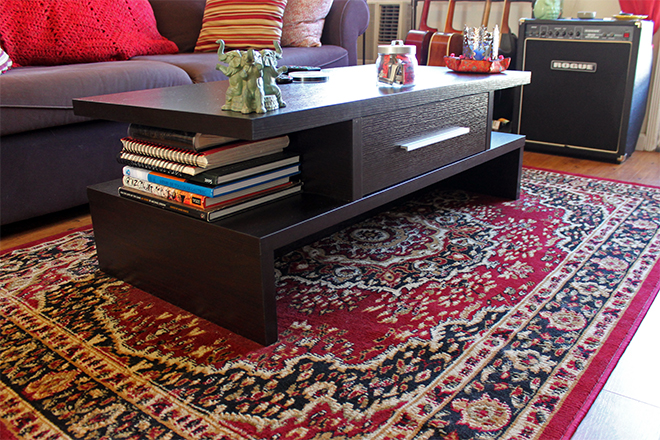
The living room before the new goods:
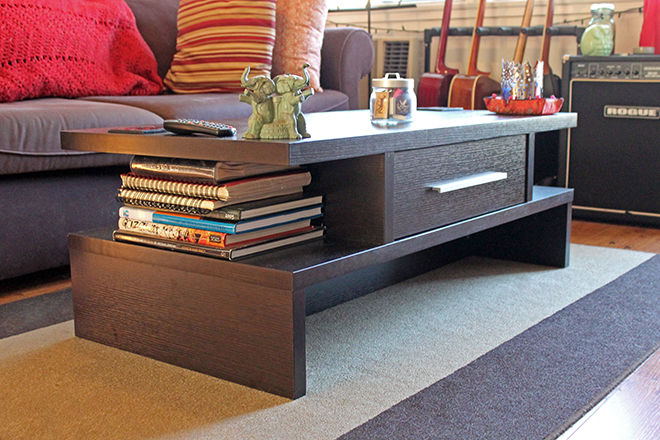
LivingRoom1_0412

And after:IMG_6521_edited

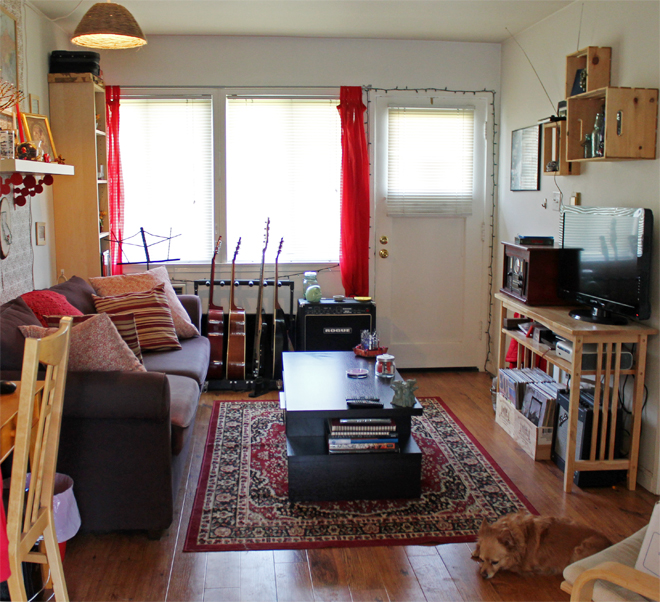
We love the way the rug brings out the pops of red in the rest of the room and adds a lot of character to the space. The best part of the whole thing, though, is that this bad boy was on sale for only $35!! WOOO! I will try and and take some better pictures of the living room soon when I can find a few spare minutes (HA!).

To complete our living room upgrade, we snagged some awesome record coasters from Amazon for only $21 (for a set of 6).

Coasters

With the new table, rug, and coasters, we can officially scratch another New Year’s resolution off of our list. Yippeeeeee!

1. KITCHEN LOVE – Since we didn’t quite get to this in 2012, I would love to get our kitchen project underway early this year!


2. ORGANIZE, ORGANIZE, ORGANIZE! – We need to do this every year! We got a bunch of Christmas gifts (books, DVDs, etc.) and have no where to put them so we need to do some spring cleaning to make room.


3. STORAGE SOLUTIONS – Now that Walker and I have lived together for over a year, we have slowly filled up all of our current storage. Aside from putting everything in the garage, we need to come up with some new ways to add storage (especially for books, DVDs, CDs, and school supplies!).


4. NEW COFFEE TABLE AND RUG – Our current coffee table is hanging on by a thread! We absolutely need to save up and replace it. We would also love to get a new, upgraded rug for underneath… class up our living room a little! :)


5. SCHOOL WORKSPACE – I love our writing desks but I am going to be doing a lot of drafting and projects that take up much more space/storage for school. We need to figure out a way to make a little more space for doing schoolwork, which is going to be really tough!

DIY Heart-Shaped Concrete Planter

As promised, I want to explain in a bit more detail how I made the DIY heart-shaped concrete succulent planter for Walker’s Valentine’s Day gift. While I could have easily gone to the hardware and craft stores for all of the supplies for the project, I chose to simplify my life and buy a “Cast Your Own” planter kit from NativeCast for $10 that included the exact supplies I needed (and the concrete is “green!”).

Photo Source: www.nativecast.com

Photo Source: www.nativecast.com

HeartPlanter1

If you decide to go find the supplies yourself, you will need to find a small bag of concrete mix (good luck on this one… concrete mix is usually sold in large bags of 50 lbs. or more! Keep your eyes peeled for a smaller “patching” kit) and a cardboard mold (craft stores sell cardboard craft boxes like the one pictured above in many shapes/sizes). Thankfully, my kit included just the right amount of concrete mix for my little planter so I didn’t have to hunt it down.HeartPlanter2

Start by wetting the cardboard box mold to ensure that you will be able separate the mold from the concrete after it dries. Then, following the instructions on your concrete mix packaging, add the appropriate amount of water to the mix so that you get a pliable paste.HeartPlanter3 HeartPlanter4

My kit came with a little wooden spreading tool but you can use a disposable spoon or something similar to spread the concrete along the inside of the cardboard mold, adding a drop or two of water to the mix if it becomes too dry.HeartPlanter5

Once all of the concrete has been spread out in the mold, use the spoon to smooth out all of the edges and make a small hole at the bottom for drainage. Set aside your project so that the concrete can dry according to the directions (mine took 12 hours but I left it for 24 hours to be sure).HeartPlanter6

Once the concrete has dried, tear or cut the cardboard mold away from the concrete. If any of the cardboard sticks, use a wet cloth to soak away the remaining pieces.HeartPlanter8 HeartPlanter7

Your planter is done! How easy was that!? I added soil and succulents to my heart-shaped planter before giving it to my valentine. I love the rustic look and the handmade feel of the concrete planter. We may have to order a few more kits and make a bunch of these for our backyard! :)HeartPlanter9_new HeartPlanter10HeartPlanter2 HeartPlanter1

**I was in no way compensated for this post by NativeCast… I just think their product is awesome! :)**

Flowers… by Walker: February 22, 2013

I t has been a busy couple of weeks but I managed to find time to snap a few pictures of my stunning Valentine’s Day roses. I thought they might brighten your Friday! Enjoy and have a great weekend! :)Flowers1